
Get yourself a Development Environment

Which Development Environment to go for...

Below are two Development tools which you'll find definitely useful for your further Projects...
Many people got a little when they hear about VS Code, It is a really powerful Text Editor with Ad-On supports to actually make help the developer work in variety of different workloads, like: Dot Net Core, Python development, NodeJs development, etc...
On the Other hand there is a Giant so called Fully Featured IDE called Visual Studio 2019 (current version). It supports out of the Box workloads.
Let's talk about them separately...

Visual Studio Code (VS Code)

According to Microsoft:
"Visual Studio Code is a lightweight but powerful source code editor which runs on your desktop and is available for Windows, macOS and Linux. It comes with built-in support for JavaScript, TypeScript and Node.js and has a rich ecosystem of extensions for other languages (such as C++, C#, Java, Python, PHP, Go) and runtimes (such as .NET and Unity). Begin your journey with VS Code with these introductory videos."
I personally use VS Code for Website Development Stuff for Front End in Plain HTML, CSS and JS
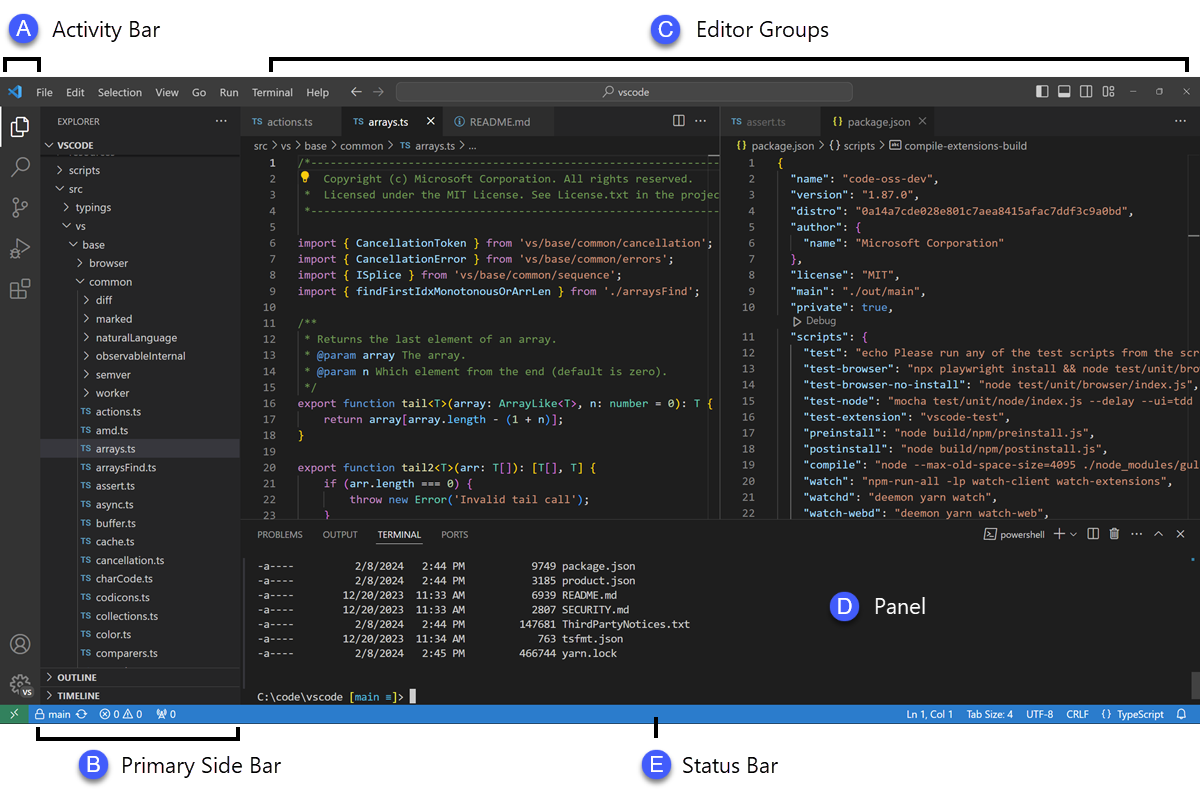
and for NodeJs and DotNet Core Application too. and for some other languages too, like C++, Python. This is my personal use cases and are not limited to it... Go and Explore the Ad-On Packages

Visual Studio #### Community Edition (Currently: 2019)

Visual Studio Community is a Fully Featured IDE to- Develop with the entire toolset from initial design to final deployment
  • Improved IntelliSense performance for C++ files
  • Local development with many common emulators
  • Simplified test access in Solution Explorer
  • Git management and repo creation in the IDE
  • Kubernetes support now included in Microsoft Azure workload
Conclusion, For Beginners looking for just give a try to Development, Definitely go for VS Code in the First Place...
For those looking for a Complete Solution for their Projects, from initial design to final Deployment and event Testing as well, then you must go for Visual Studio
For Downloading and Other Details Visit:

Comments

Popular posts from this blog

Creating a URL Shortener Deplyment on Azure (NodeJS) part-2

For reference to the previous post, please refer to this link : Connecting-to-our-Database Now let's head to the package that we added config in the npm install command, what it does is that it will look for default.json the file inside config (folder) which we created earlier that will consist of the global variables for our project. Now let's open that default.json file and place the below snippet in it: { "mongoURI": "<ConnectionStringHere>" } We'll replace the Connection String from the cluster's string from our Atlas Account (if you still don't have an account, click here to create one) After Logging in to the Atlas, create a free Cluster and add a database user in it Now use the below code in the db.js the file inside the config (folder): const mongoose = require('mongoose'); const config = require('config'); // Grab the Connection string URL from the default.json file const db = confi
Post-Event Resources- Ai Gaming with Microsoft Azure Heya  Folks hope you enjoyed the Event, do let us know in the comment section about your experience. As said, Here are the Post Event Resources for your continual Learning... Basic Concept of Ai (Theory) AI in Video Games: Toward a More Intelligent Game What is an API Open-Ai 5 Article Microsoft Cognitive- Getting started with Azure Cognitive Services Bundled Playlist on Youtube Microsoft Cognitive Vision Service- Try for Free online Some Videos by Siraj:  OpenAI Five vs Dota 2 Explained How to Install OpenAI's Universe and Make a Game Bot    How to Make an Amazing Video Game Bot Easily Hope you find the Resources resources... For folks interested in Microsoft Azure ML, Click Here

Signing Up for Azure 4 Students Account

Sign-Up: Microsoft Azure 4 Students Hola readers, In this post we're gonna learn how to create a new Microsoft Azure Account for Students. As a typical Azure account requires you to provide with the Credit Card details but due to the fact that not all the students around the globe have credit cards. So Microsoft have a provision for granting Azure Credits to students by the help of their Educational Account provided by their School/ Universities. Here are the steps provided to create a new Azure4Students Account (Though a video is also available to follow along): Text version of the SigningUp Process Visit: aka.ms/Azure4Students Sign in with your Microsoft Account or create a Microsoft Account if you don't have one After successfully logging in, enter your Country code & mobile number. Then click on the Verification options (Text/ Call) for your Identity verification. Next comes the Student Verification. This can be done by either: Providing your scho
Counter Widget